Getting Started
Features
- API
- Blocks
- Blocks with JS
- Helper Classes
- Block Fields
- Accessing Fields
- Text Margin
- Presets
- Block Settings
- Drag & Drop Sortable
- Block Spacings
- Custom Block Stubs
- Widgets
Requirements
PHP>=8.0ProcessWire>=3.0.227RockMigrations>=3.30.0RockFrontend>=3.6.0- API
Blocks
Blocks are actually ProcessWire pages with a corresponding template and a custom pageclass.
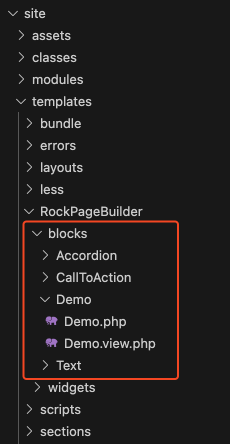
Every block lives in /site/templates/RockPageBuilder/[fieldname] and comes with the following files:
- A PHP file that holds all the settings and business logic
- A view file that defines the frontend markup
- An optional stylesheet
Creating Blocks
Please see the quickstart guide.
Rendering Blocks
By default RockPageBuilder will create the field rockpagebuilder_blocks that you can add to any page. When using this field you can render the content of this field like this:
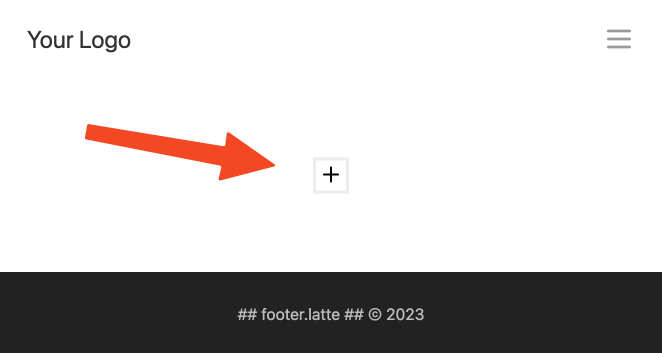
echo $rockpagebuilder->render();If no content exist on that page it will render a plus to add content:
You can create as many RockPageBuilder fields as you want. If you added a RockPageBuilder field called foo you can render it like this:
echo $page->foo->render();By default RockPageBuilder will render a "plus" icon on empty fields. If you don't want that you can provice false as render parameter:
echo $rockpagebuilder->render(false);
echo $page->foo->render(false);
Drag & Drop Sortable
If you want to make your sections sortable via drag and drop all you have to do is to add the sortable attribute to the wrapping element:
<main sortable>
  <?= $rockpagebuilder->render() ?>
</main>
For details about sortable see the docs.
Block title and description
You can add a title and description of your block in the info() method:
public function info()
{
  return [
    'title' => 'Spacings',
    'description' => 'Please see docs about Block Spacings!',
    'icon' => 'cube',
    ...
  ];
}
This is how it will look like when adding a new block:
Conditional Blocks
In your block's info method you can also define on which pages the block is available in the UI for adding new blocks:
public function info()
{
  return [
    'title' => 'Blog-Headline',
    'description' => 'This headline is only available on blogitem pages!',
    'show' => function($page) {
      return $page->template == 'blogitem' ? true : false;
    },
  ];
}
You could also show blocks only to superusers:
public function info()
{
  return [
    'title' => 'Superuser-Block',
    'show' => function($page) {
      return $this->wire->user->isSuperuser();
    },
  ];
}
Note: The show method in the info() function serves only as a visual restriction in the UI, determining whether the block's addition button is displayed. It does not prevent the existence of already created blocks of the same type if the show method later returns false. Additionally, this method does not provide a security mechanism against direct POST requests that could create the block; it merely controls the visibility of the UI element.
If you need a more secure way to restrict blocks have a look at the getAllowedBlocks method in the code.
Block Field Defaults
You can provide defaults for your block-fields, for example this would pre-fill the title field of every Gallery block with Some great images:
class Gallery extends Block
{
  public function info()
  {
    return [
      'title' => 'Gallery',
      'defaults' => [
        'title' => 'Some great images',
      ],
    ];
  }
}
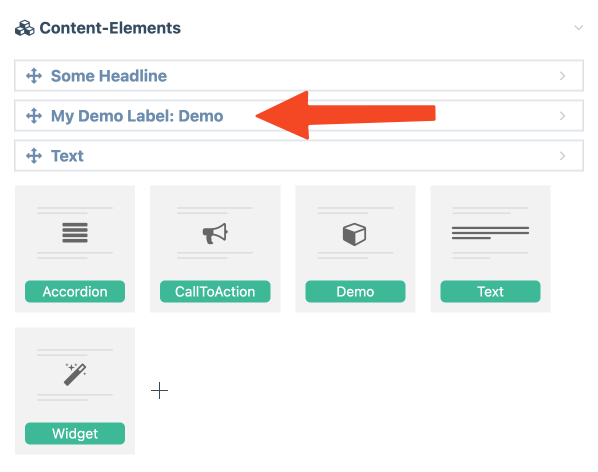
Custom Block Labels
If you don't like the default label of your block, simply define your own in the block's PHP file:
public function getLabel()
{
  return "My Demo Label: " . $this->title;
}
Note that you can return any content you want - you can even return the content of a richtext field. RockPageBuilder will automatically remove all tags and truncate it to an appropriate length.
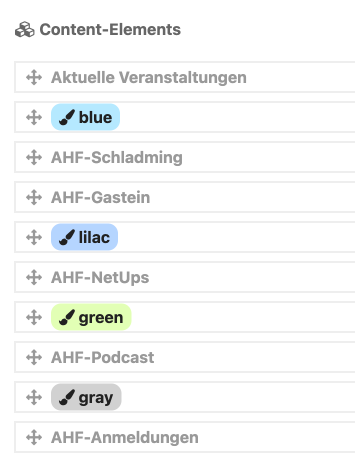
HTML Labels
You can even get creative and add helpful HTML to your block labels - like in this example that shows the differently colored sections:
public function getLabel()
{
  // get the block's color name and css style attribute
  // this is a project-specific implementation that will not work for you!
  $style = $this->colorStyle();
  $name = $this->colorName();

  return $this->html(
    "<span $style><i class='fa fa-paint-brush'></i> $name</span>"
  );
}
Block Thumbnails
Available Thumbnails
The module ships with several thumbnails for common page building blocks. All available thumbnails are shown on the module config page, where you can click on the thumbnail and it will copy the name of the thumbnail to the clipboard.
Then just add the name to your block's info method:
public function info()
{
  return [
    'title' => 'Text with Image',
    'thumb' => 'TextImage',
  ];
}
Alternatively you can either choose to use one of the Font Awesome icons, which is the quickest option, or you can create and upload your own thumbnail image.
Icon
To use an icon as thumbnail all you have to do is to set the icon property in the info() method. You can use any of the Font Awesome 4 icon names: https://icones.js.org/collection/fa
public function info() {
  return [
    ...
    'icon' => 'check',
  ];
}
Image
If your block's PHP file is Demo.php simply add an Image called Demo.png|jpg|svg to that folder and RockPageBuilder will display that thumbnail instead of the icon:
Obviously it might not be the best idea to mix icons and images like in the screenshot above. Besides that images also have another drawback: If you provide style variations for your block in the block's settings you can only show a preview of one setting and that might confuse the user, whereas an icon is more abstract.
It looks a lot better if you use images for all blocks:
And it might look even better when using real world screenshots as thumbnails:
Note that using icons can be preferable to images for two reasons:
- It's less effort
- Icons are abstract. If you build a block where the user can choose from three different styles then an image will only show one version of that block whereas an icon shows all three styles in an abstracted way.
Special Names
RockPageBuilder ships with thumbnails for the following block names: Gallery, Headline, Hero, Quote, Text, TextImage. See site/modules/RockPageBuilder/buttons/
Sorting and Grouping Blocks
You can define the group and a groupSort property for every block in its info() method:
public function info()
{
  return [
    ...
    'group' => 'Demo Group',
    'groupSort' => 1,
  ];
}
By default blocks will be sorted by their name in alphabetical order. You can change that by manually providing a groupSort parameter where a lower numbers appear first. The default sort value is 100.
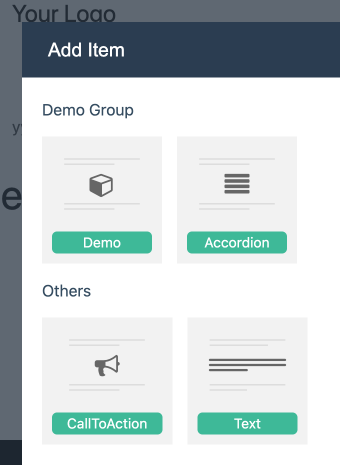
This groups will then be used in the UI when adding blocks from the frontend:
Groups will not be used on the backend to make the UI more compact.
Reusing Blocks
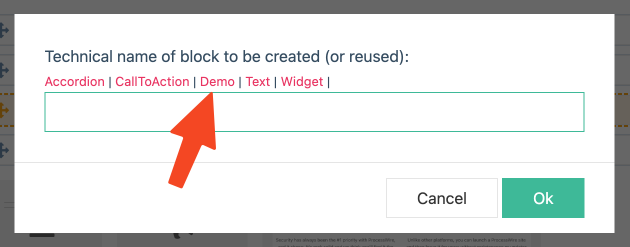
If you use multiple RockPageBuilder fields in your project you can reuse blocks in other fields by just creating an empty PHP file with the name of the block in the folder of the field. Alternatively just click on the name of the block that you want to reuse when adding a block via GUI:
Removing Blocks
You can remove blocks either by deleting the block's folder (eg /site/templates/RockPageBuilder/blocks/Demo) and doing a modules refresh or you can go to the module's settings page and choose the block to delete.

